Resources
Bluetooth CAT Interface
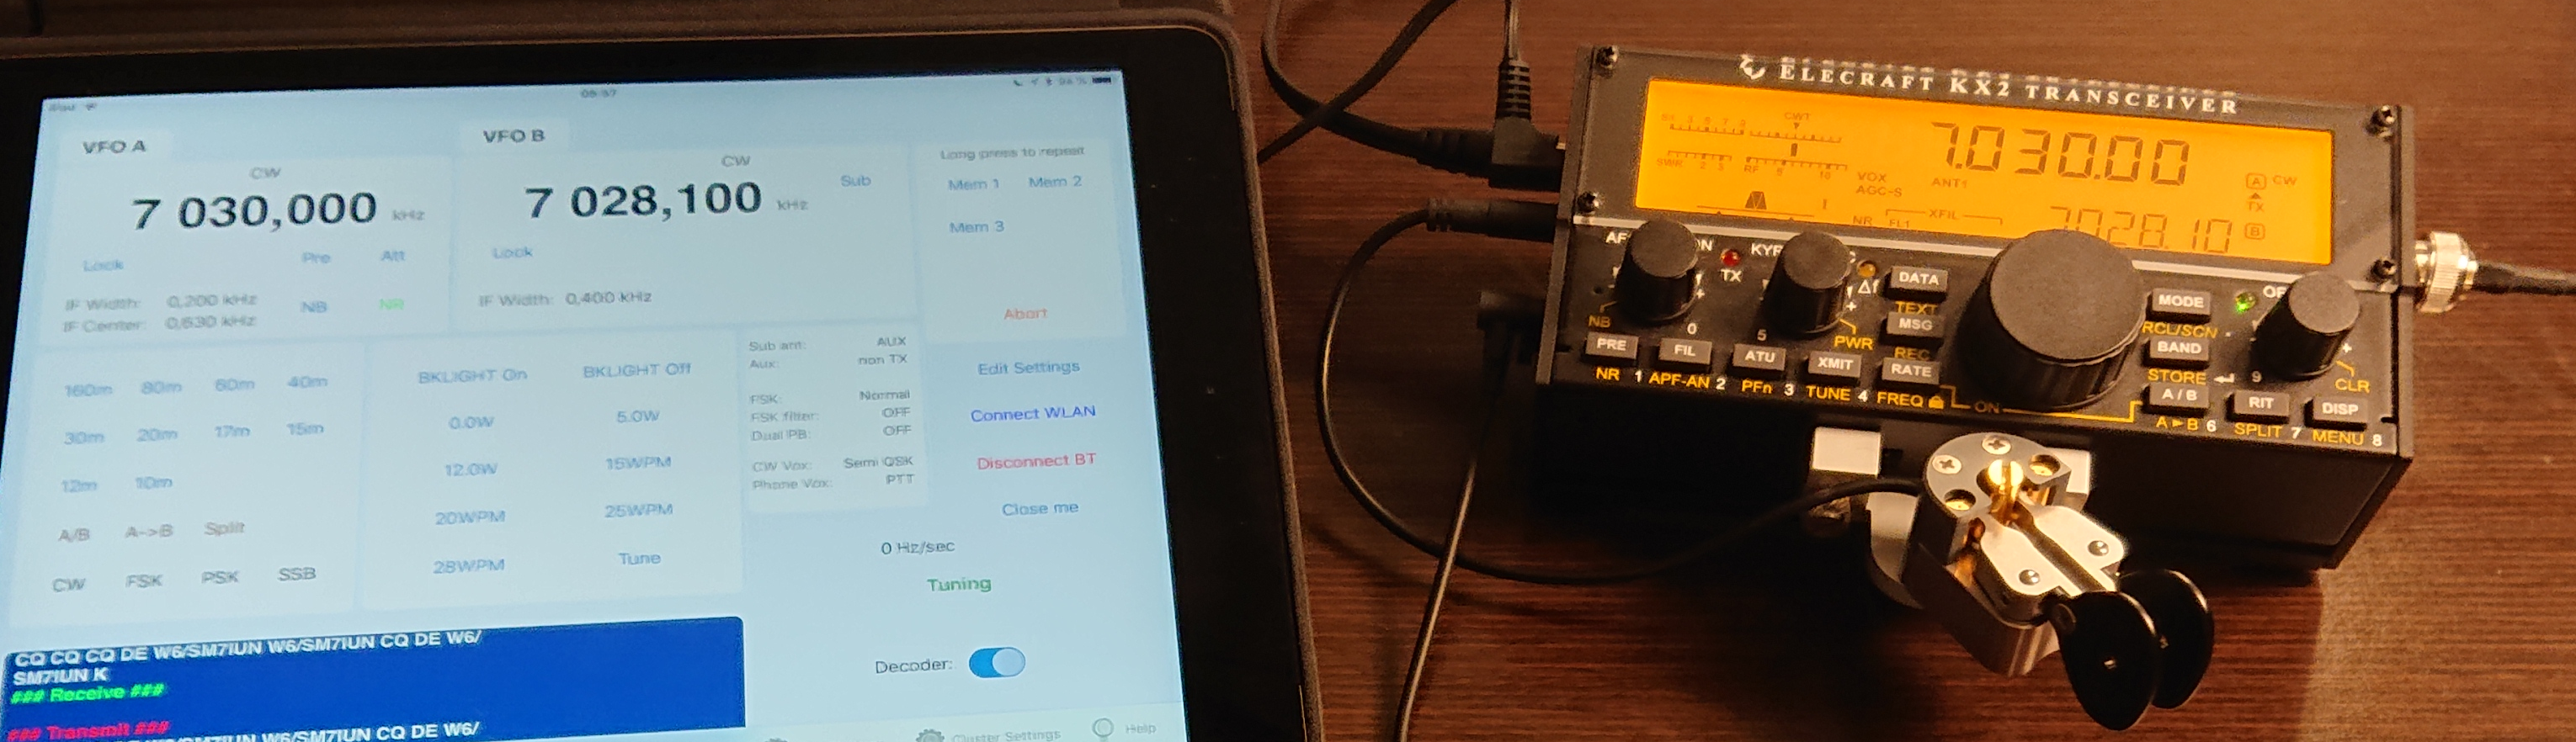
I don’t like entering paper logs after a portable operation but prefer to do the logging on my iPad when I’m in the woods, at a mountain top, or in a hotel.
There are many good logging apps for iPad but the one I prefer is RUMlog, or RUMlogNG2Go which is the full name. The app is not free but I find it worth its price. It’s easy to use and the author, Thomas DL2RUM, is very active in the support forums,. RUMlog supports both my KX2 (using the CAT interface described below) and my IC-705 via its embedded Bluetooth CAT interface.
Component selection
Using TTL levels on CAT interfaces is common today, but Elecraft sticks with the RS-232 standard. The “advantage” is that you can connect the radio directly to a PC with a serial port (if you can find one!), the disadvantage is that the interface is dependent on both a positive and a negative supply voltage. Fortunately, there are IC solving this problem, such as MAX3232 from Texas Instruments. From a 3.3V supply, it internally creates both +12V and -12V and uses the voltages to convert both incoming and outgoing TTL level signals to RS-232 levels. Using one of these together with Bluetooth module with serial port was an obvious choice.
There are plenty of Bluetooth modules with serial interfaces, but as I have already mentioned, far from everyone is on good terms with the iPad. I learned this the hard way by trying a whole range of cheap Bluetooth UART modules such as the popular HC-06 and HM-10. HC-06 only supports Bluetooth 2.0 EDR and is thus not compatible with iOS, HM-10 supports Bluetooth LE 4.0 but it is not recognized by iOS. After spending time googling and in web forums, the choice fell on a module with the long name Adafruit Bluefruit LE UART Friend, Adafruit 2479 for short.
Others have successfully used it with the iPad and it also has the advantage that it can be powered with any voltage between 3.3 and 16V. As an added bonus, it has a regulated 3.3V output port which is perfect for powering the MAX3232 level converter. I started designing a small circuit board for the MAX3232, as it requires a number of external capacitors for its charge pumps, but soon found a ready-made module that contained all the necessary components and had all the important signals routed to the edge of the board – Sparkfun MAX3232 Breakout. Since it can be powered by the Bluetooth module, the Adafruit module thus eliminated all discrete components from my design, except for a choke and capacitor for an EMC filter on the incoming supply voltage.
The picture below shows the first working prototype.
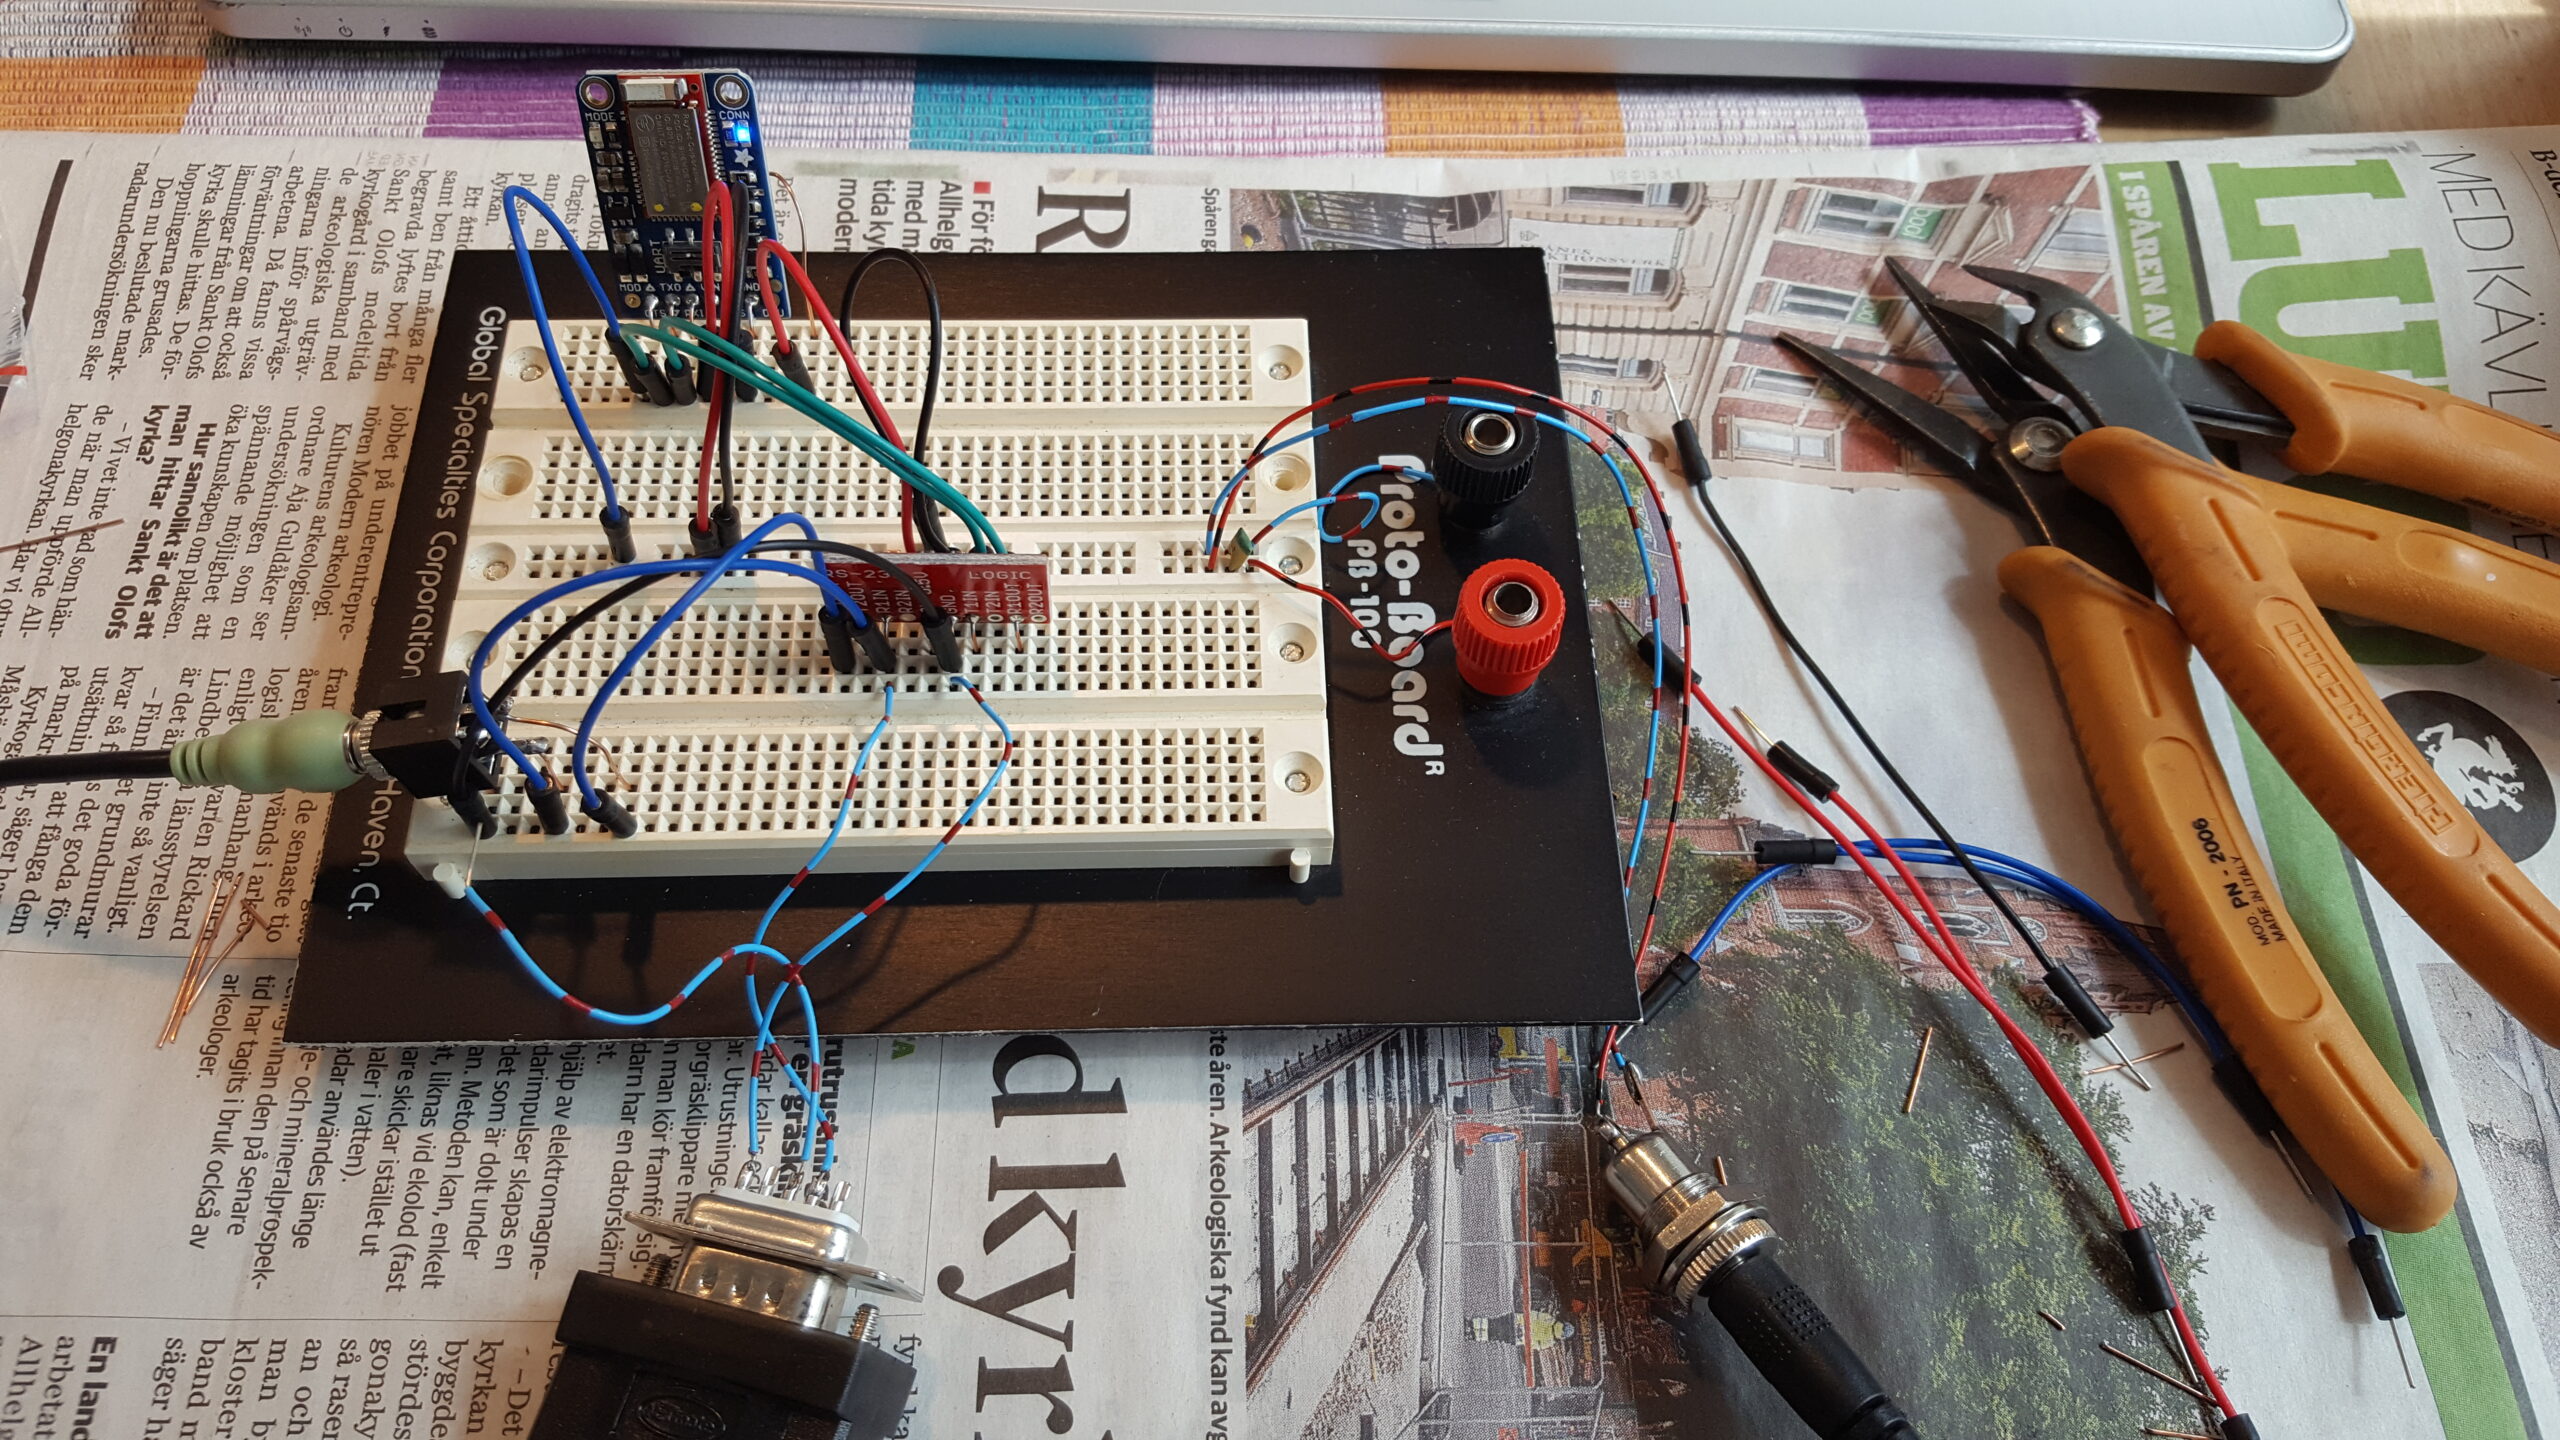
The item at the top of the below schematic is the programming adapter which is further described below.

Assembly
My main design requirements were:
- Possibility to connect to a standard RS-232 port for (re-)programming (9-pin DSUB)
- Flexibility in power supply, e.g. 9V dry cell battery or 12V portable accumulator
- Small size
- Resistant to dust, dirt, and drizzle
The obvious choice would be a standard plastic box with a 9V battery compartment, a 9-pin D-SUB for CAT and a 2.1mm DC jack for an external voltage supply but I quickly realized this would approach the KX2 in size and also require a set of specially made cables.
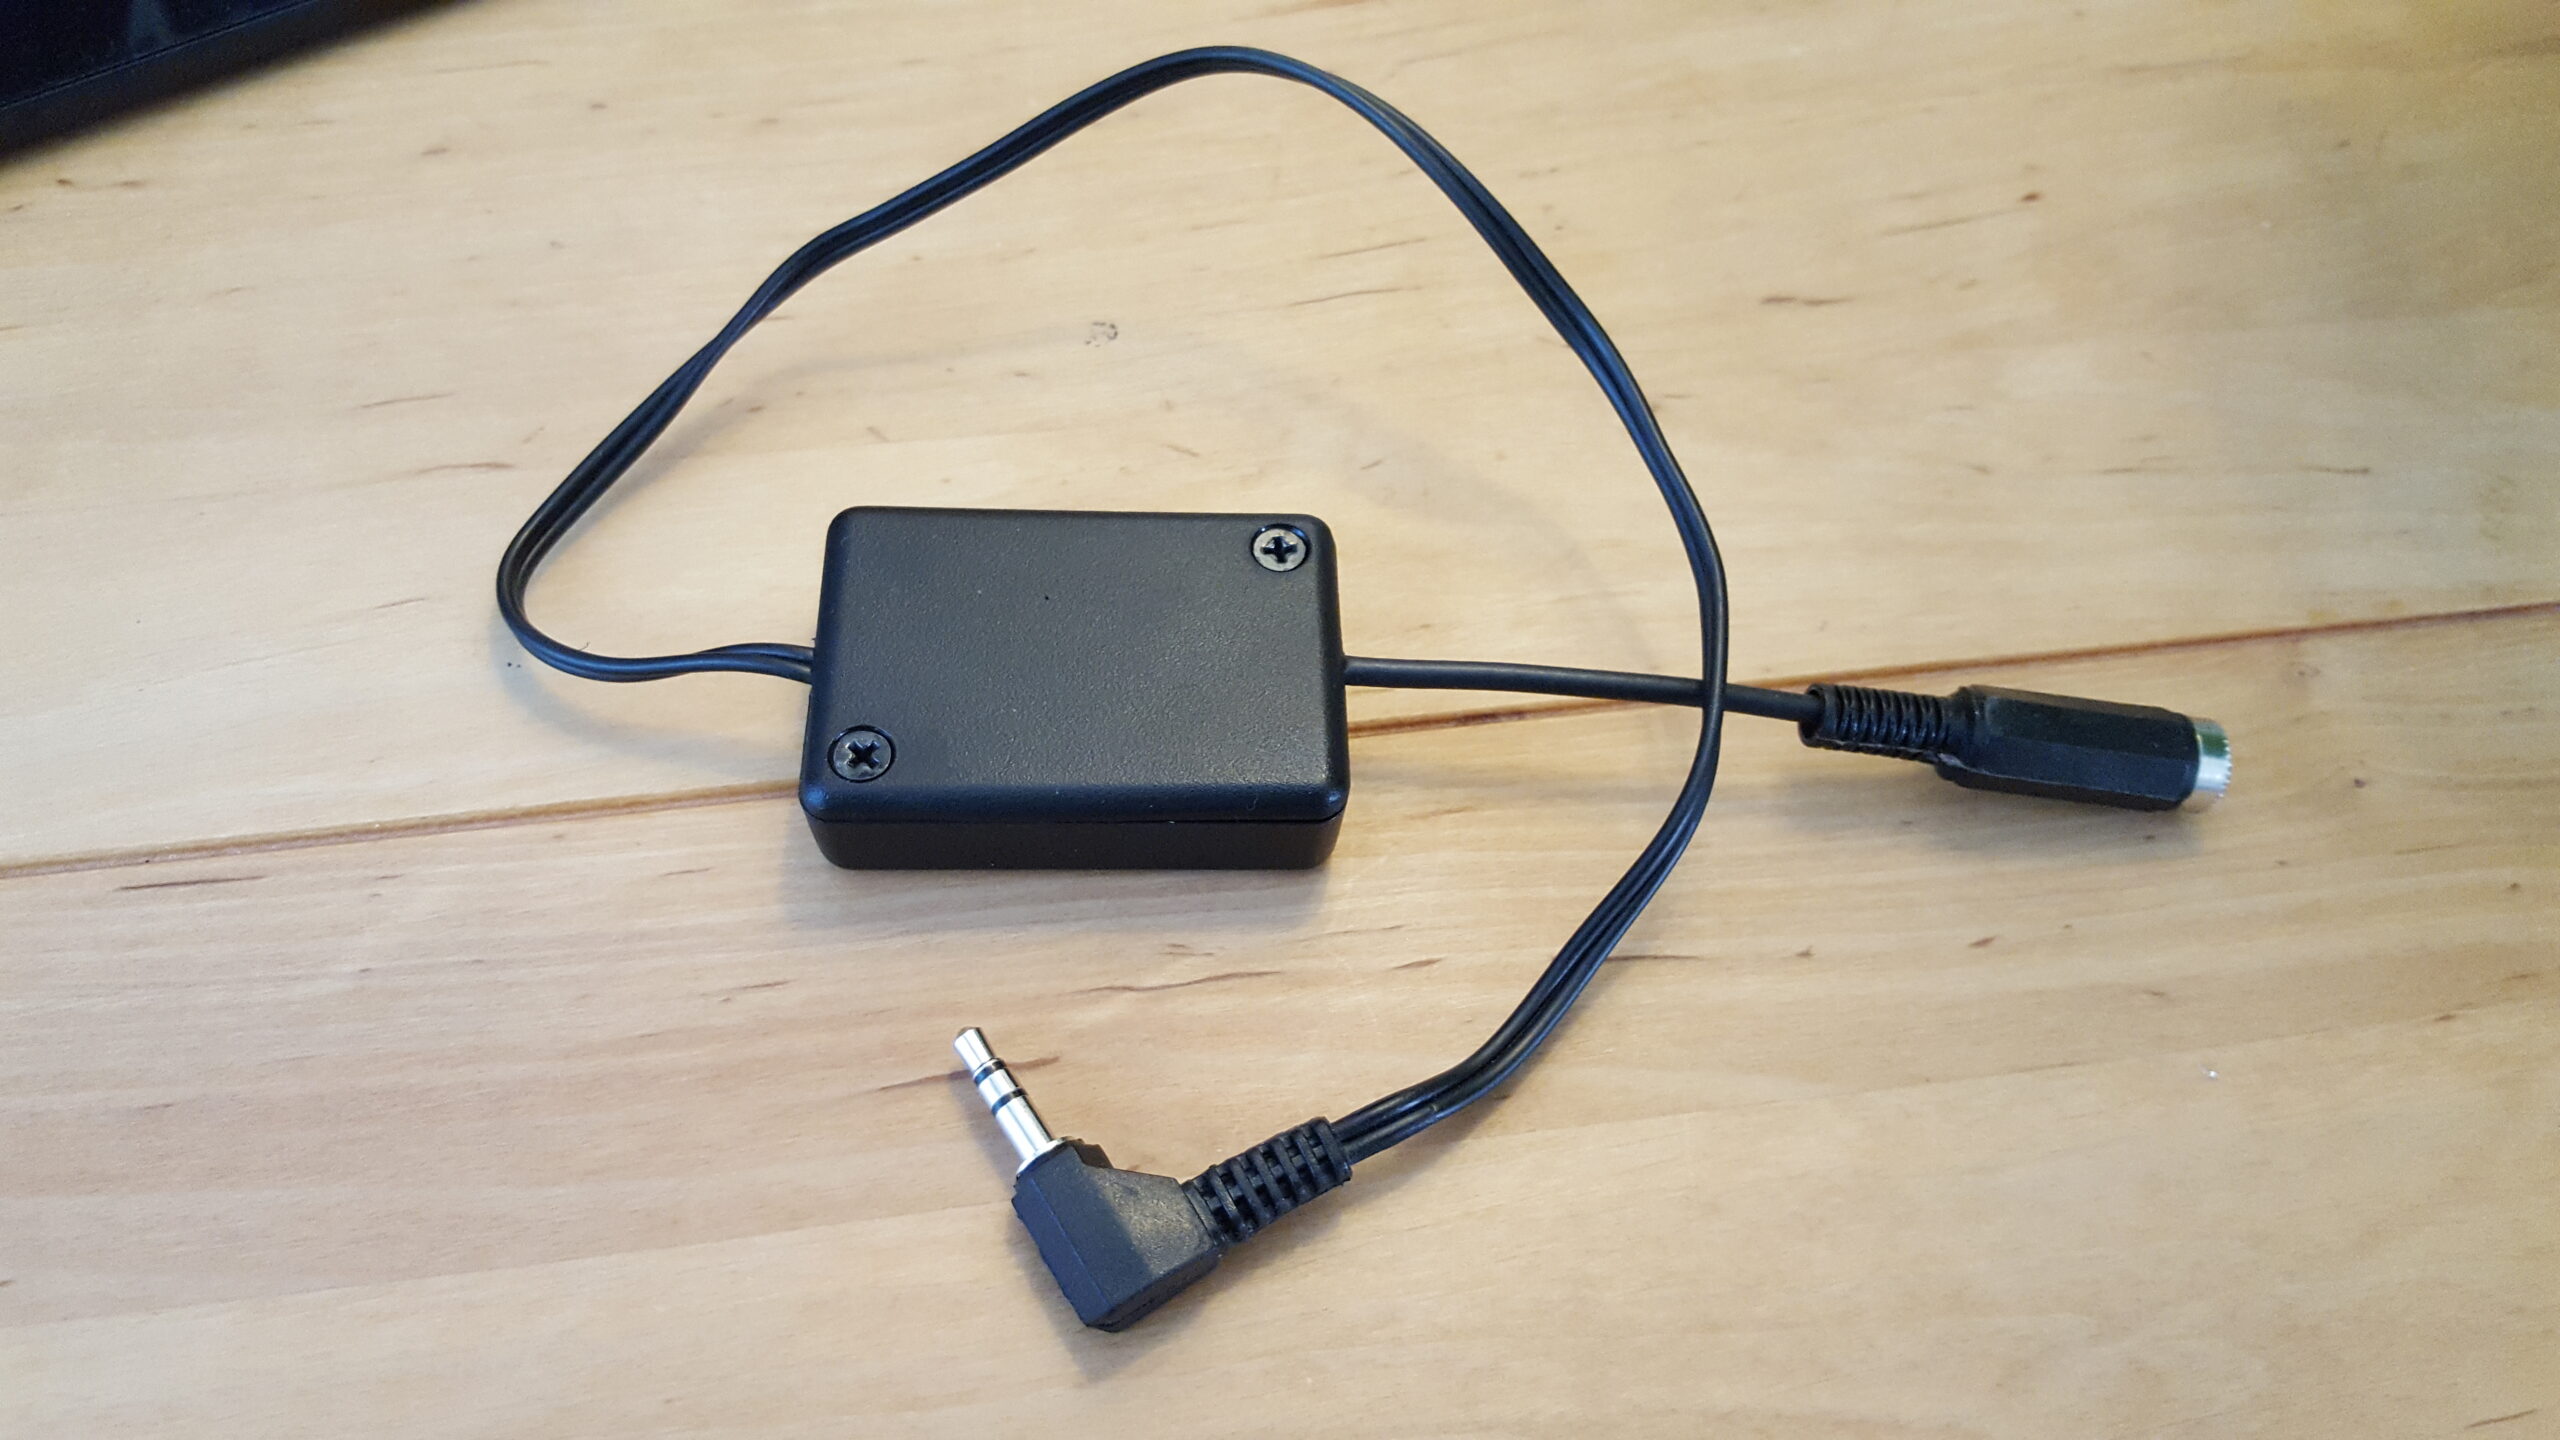
By sacrificing the 9V battery compartment and the connectors the design could be made drastically more compact. Without connectors on the enclosure it also becomes much more dust and dirt resistant.
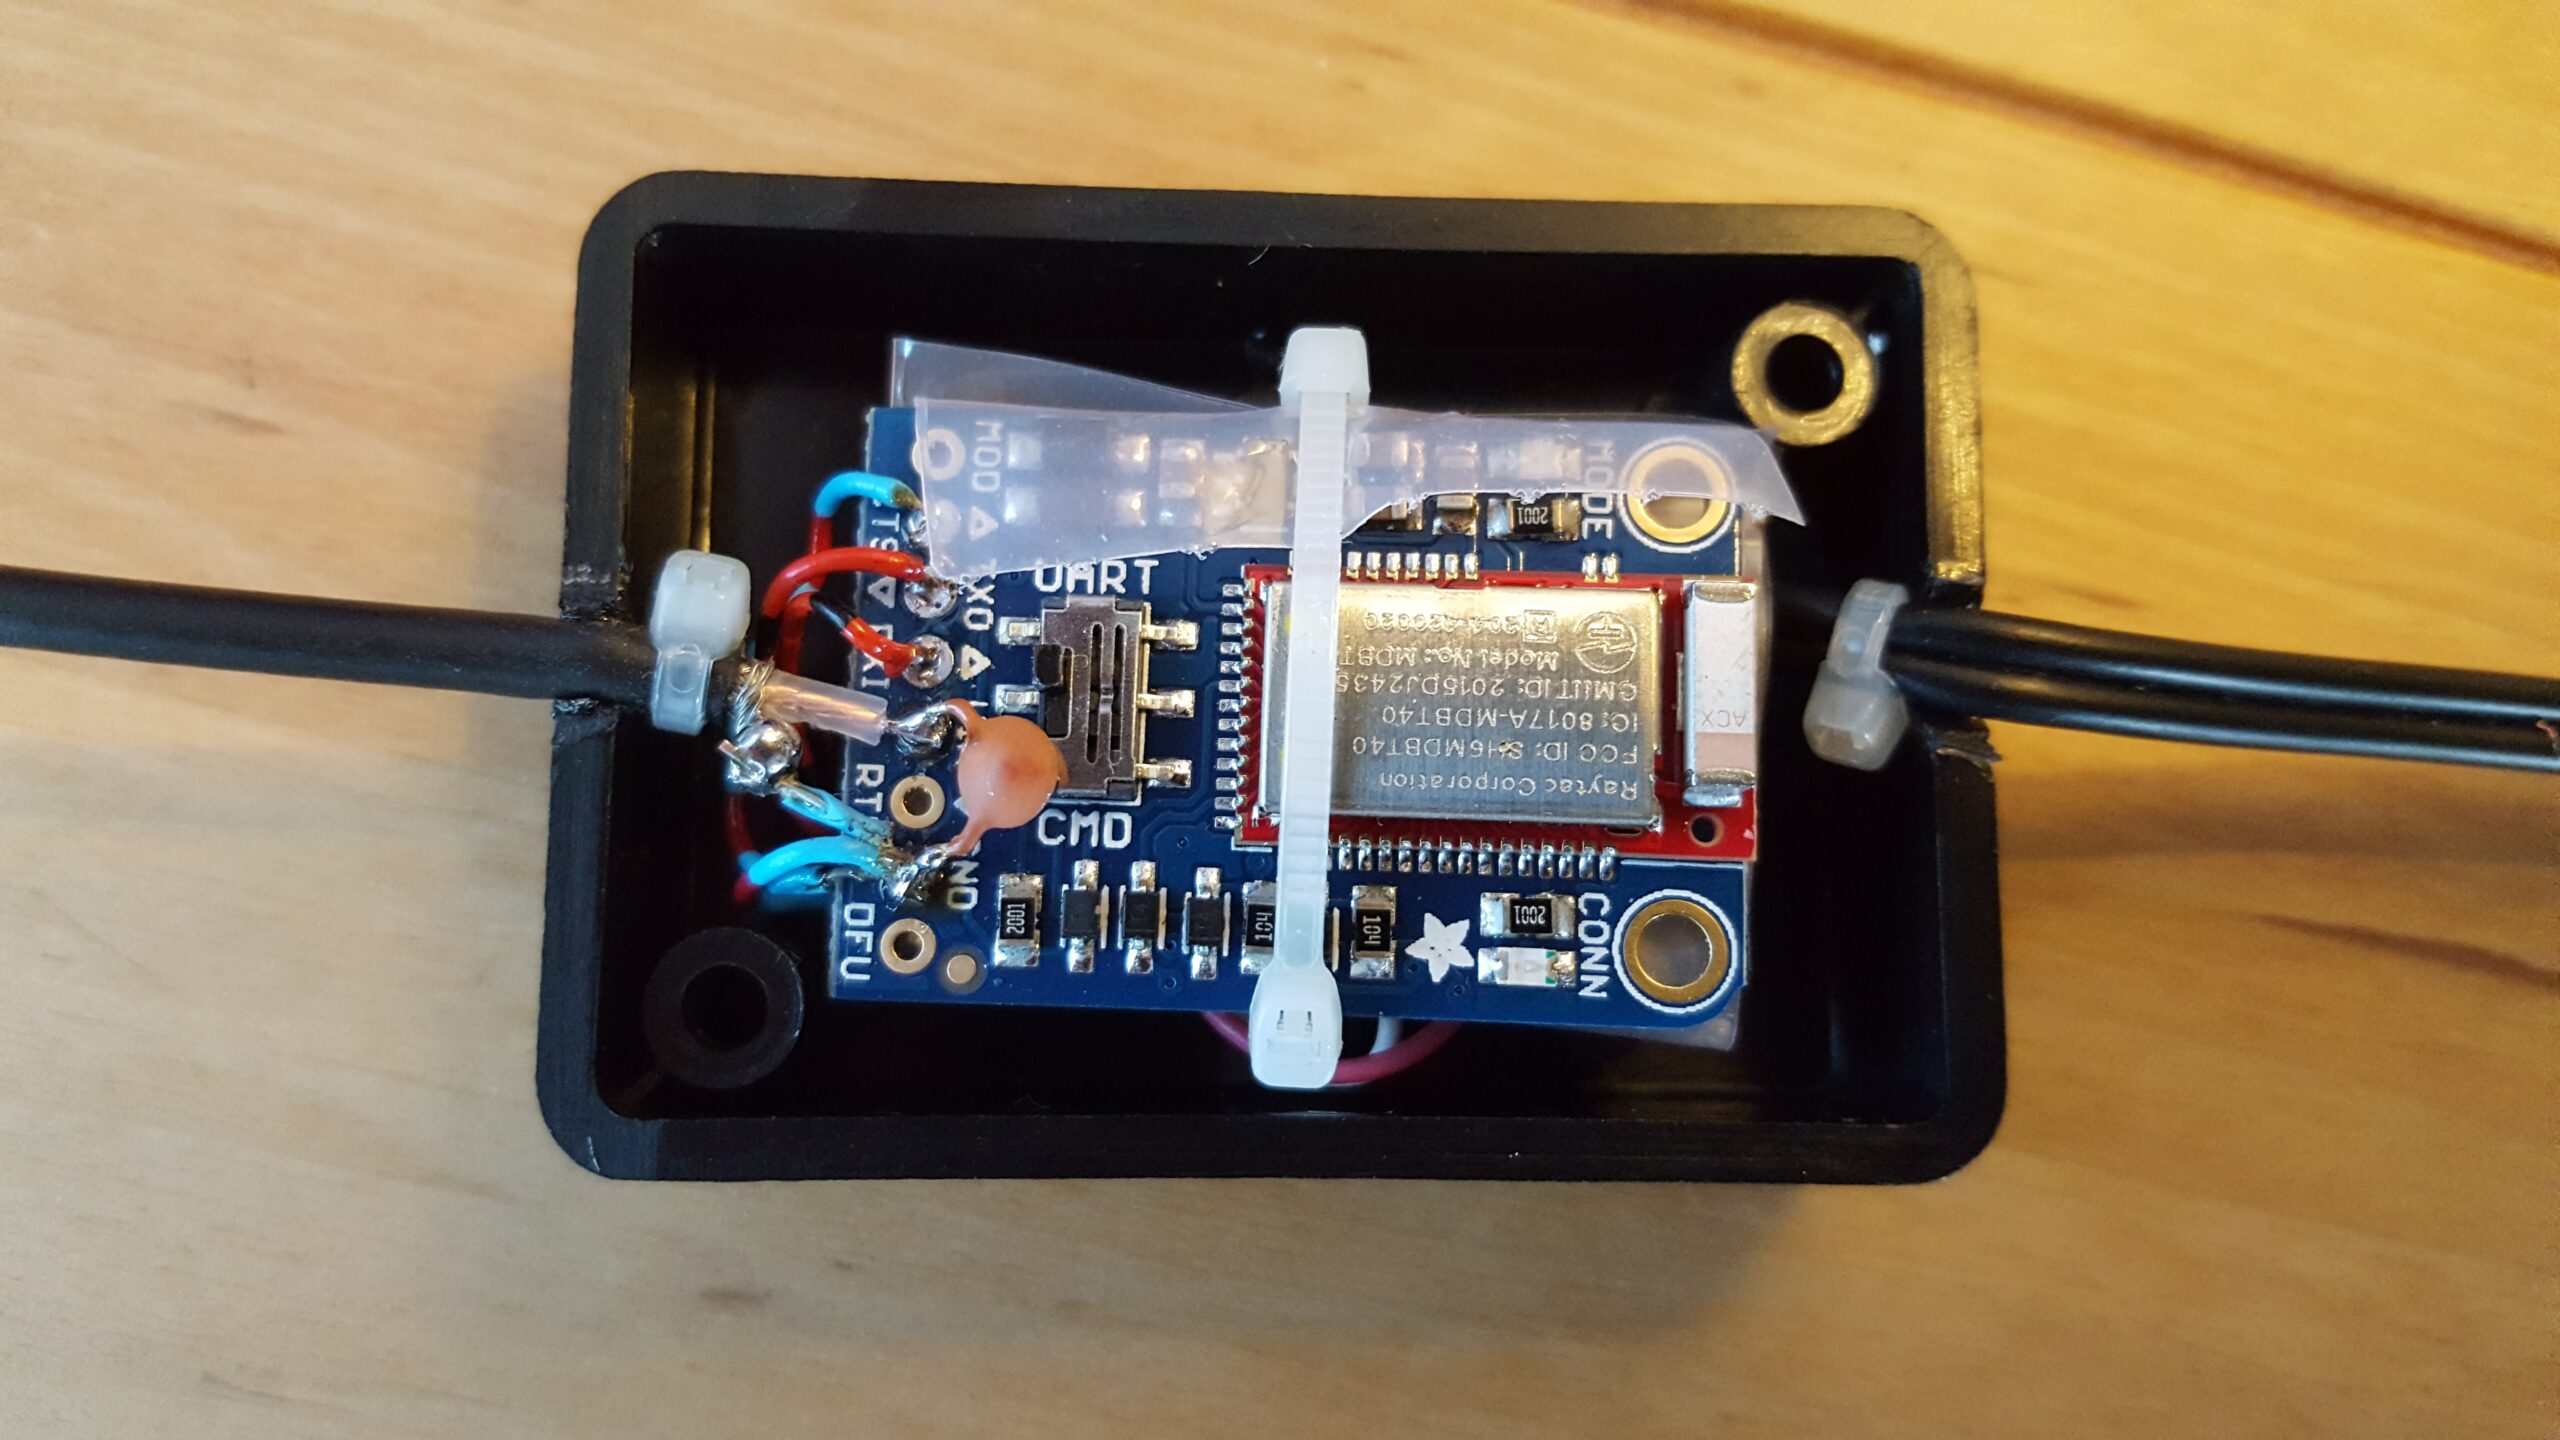
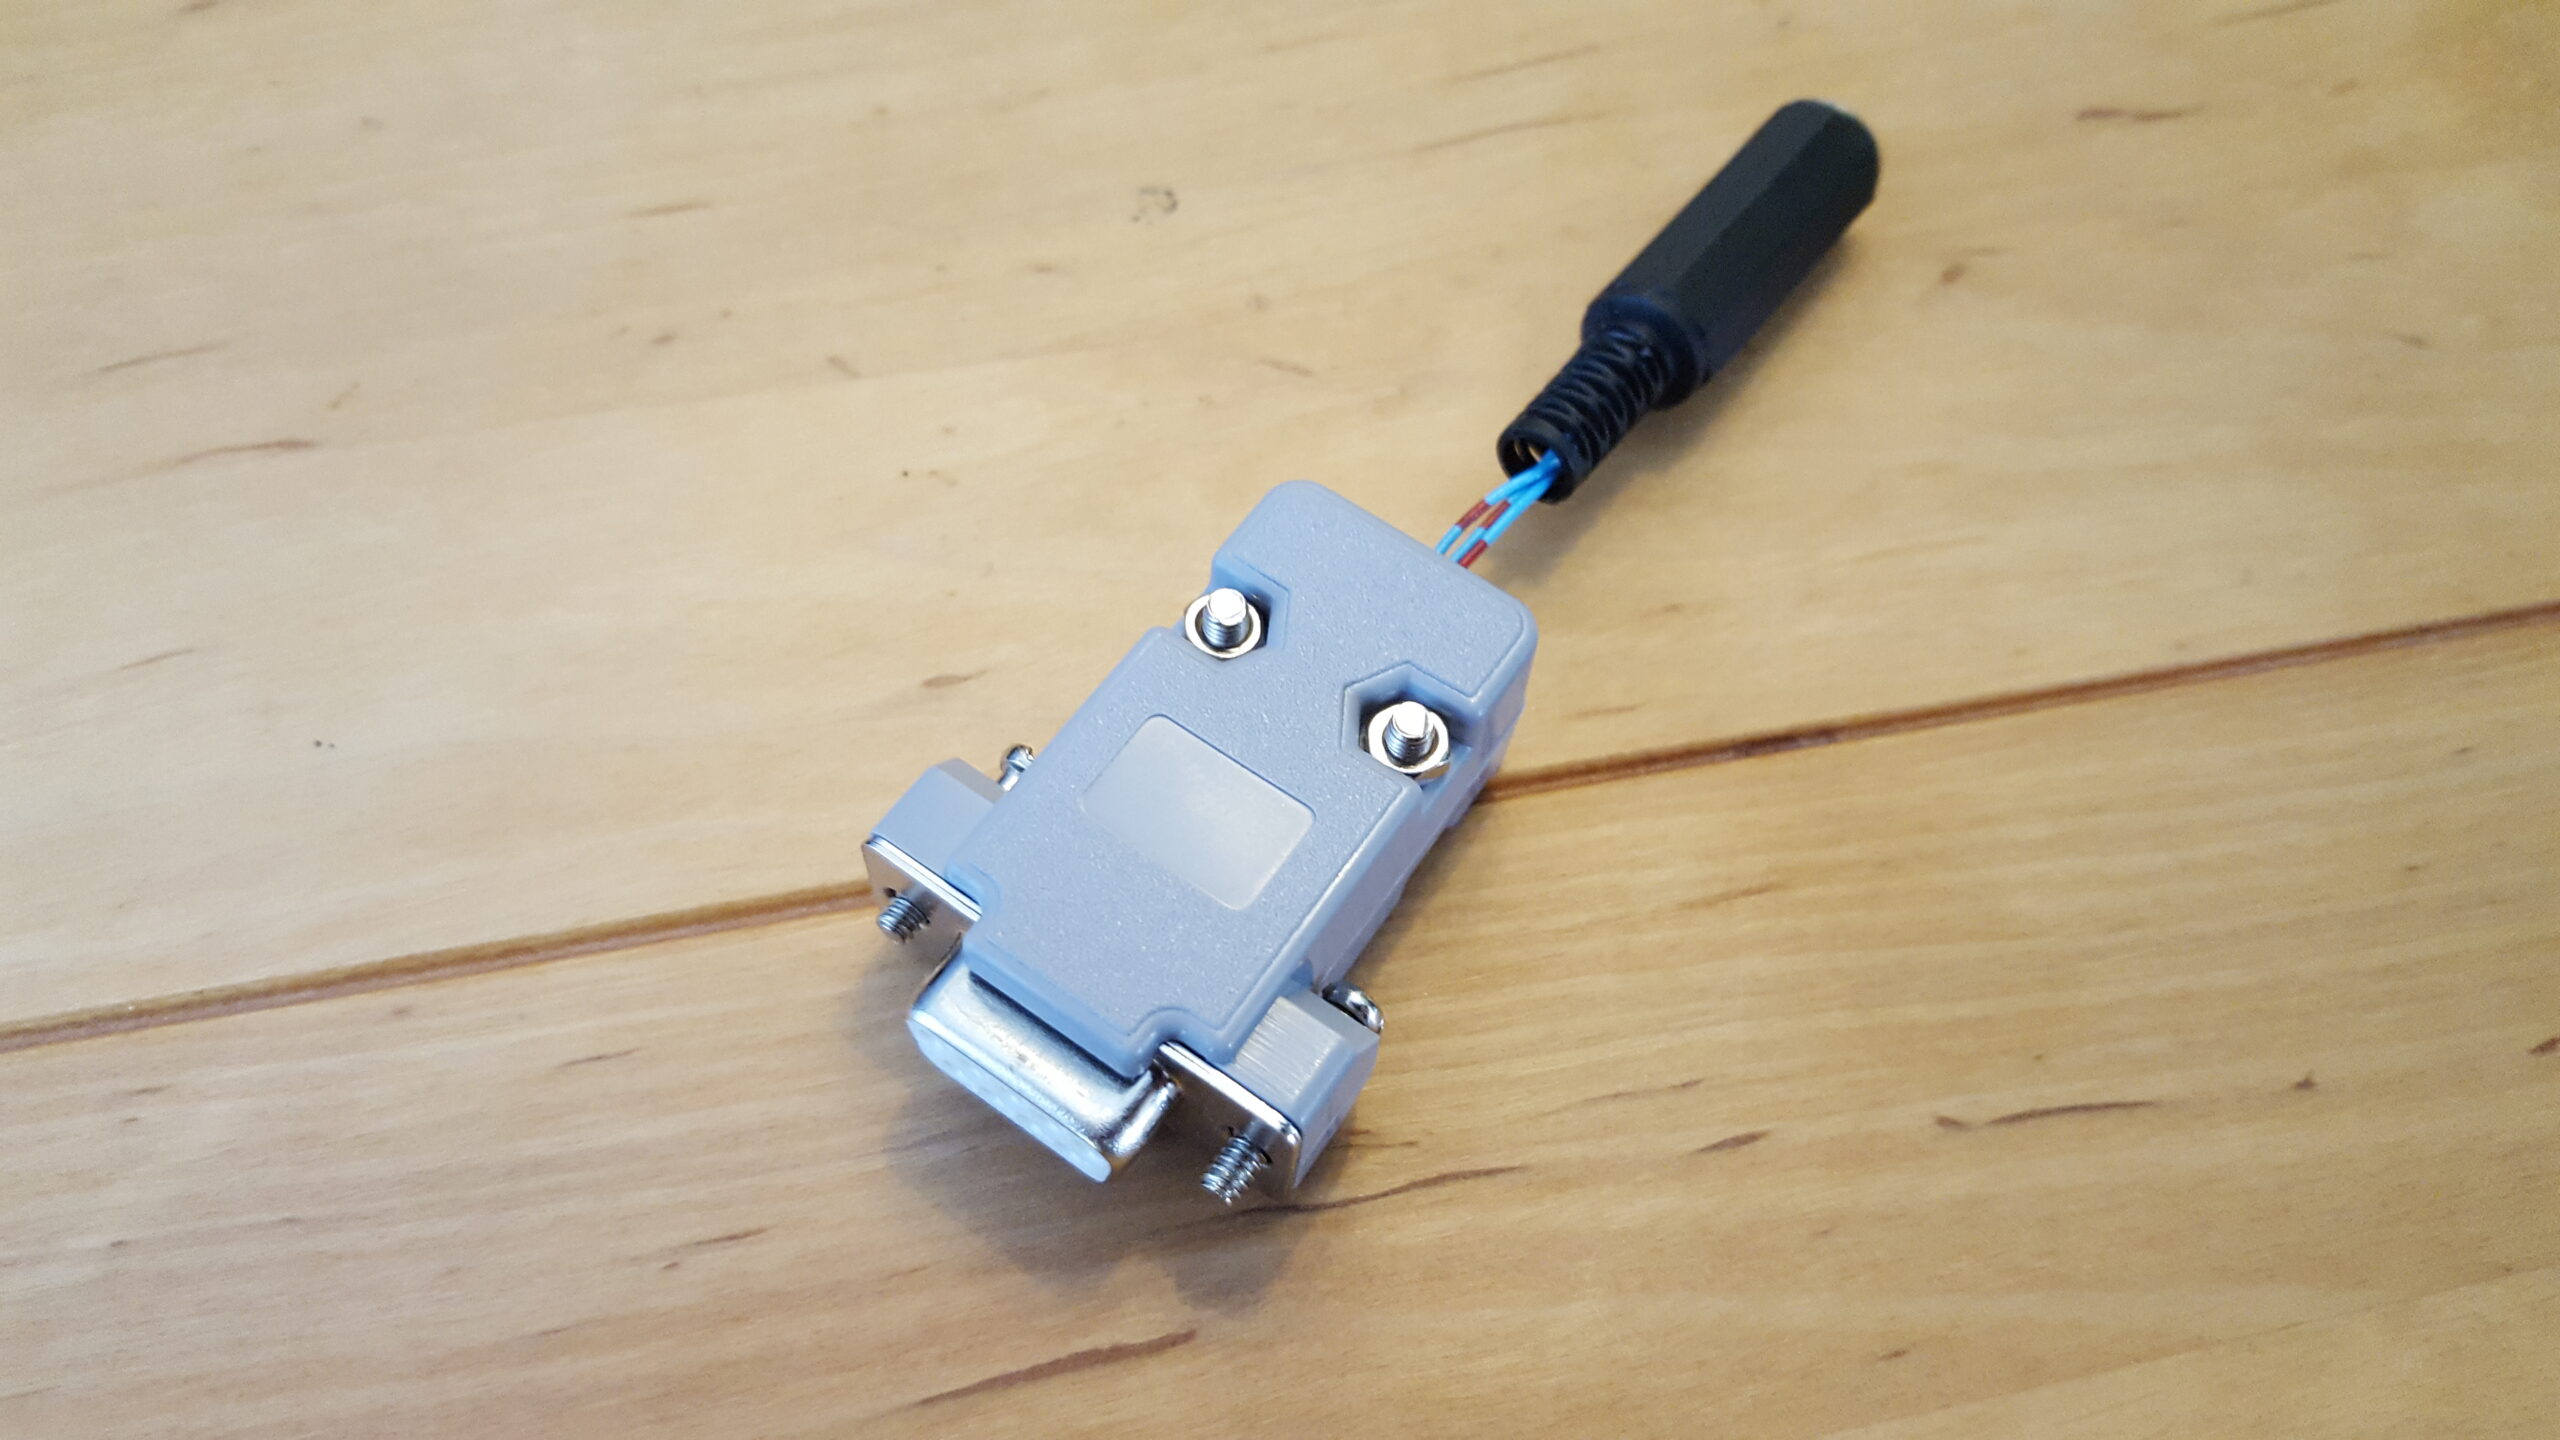
I chose the Hammond 1551FBK enclosure with the dimensions 50x35x15mm that the two stacked cards fit snugly in. Four light presses with the soldering iron made suitable recesses in the sides and lids for the cords that were also strain-relieved with regular cable ties. The cable with the 3.5mm plug was found in the junk box and the power supply lead was made of a piece of RG-174 and a cable-mount 2.1mm DC jack.
The only real disadvantage with this approach is that you need an adapter for programming the module. But since you re-program the module extremely rarely, maybe only once, it is a good trade-off. If you select this option, keep in mind that RS-232 connectors can have two configurations – “modem” or “terminal” – and they have the two communication lines reversed. Depending on the type of connection you use to your computer, you may need to switch them compared to my schematic. The diagram is designed to work with a standard USB-to-RS-232 adapter cable connected to the computer.
Programming
If you want to make it easy on yourself, you can use the factory default settings of the Adafruit module. It is pre-programmed with 9600 bits/s and with the small switch in “UART” mode it works straight out of the box. However, since the CAT interface on the Elecraft KX2 can run up to 38400 bits/s, I of course wanted that speed.
My first step was to update the firmware in the Bluetooth module because the one that was in mine ( version 0.5.0) was so old that it actually lacked the command to change the speed.
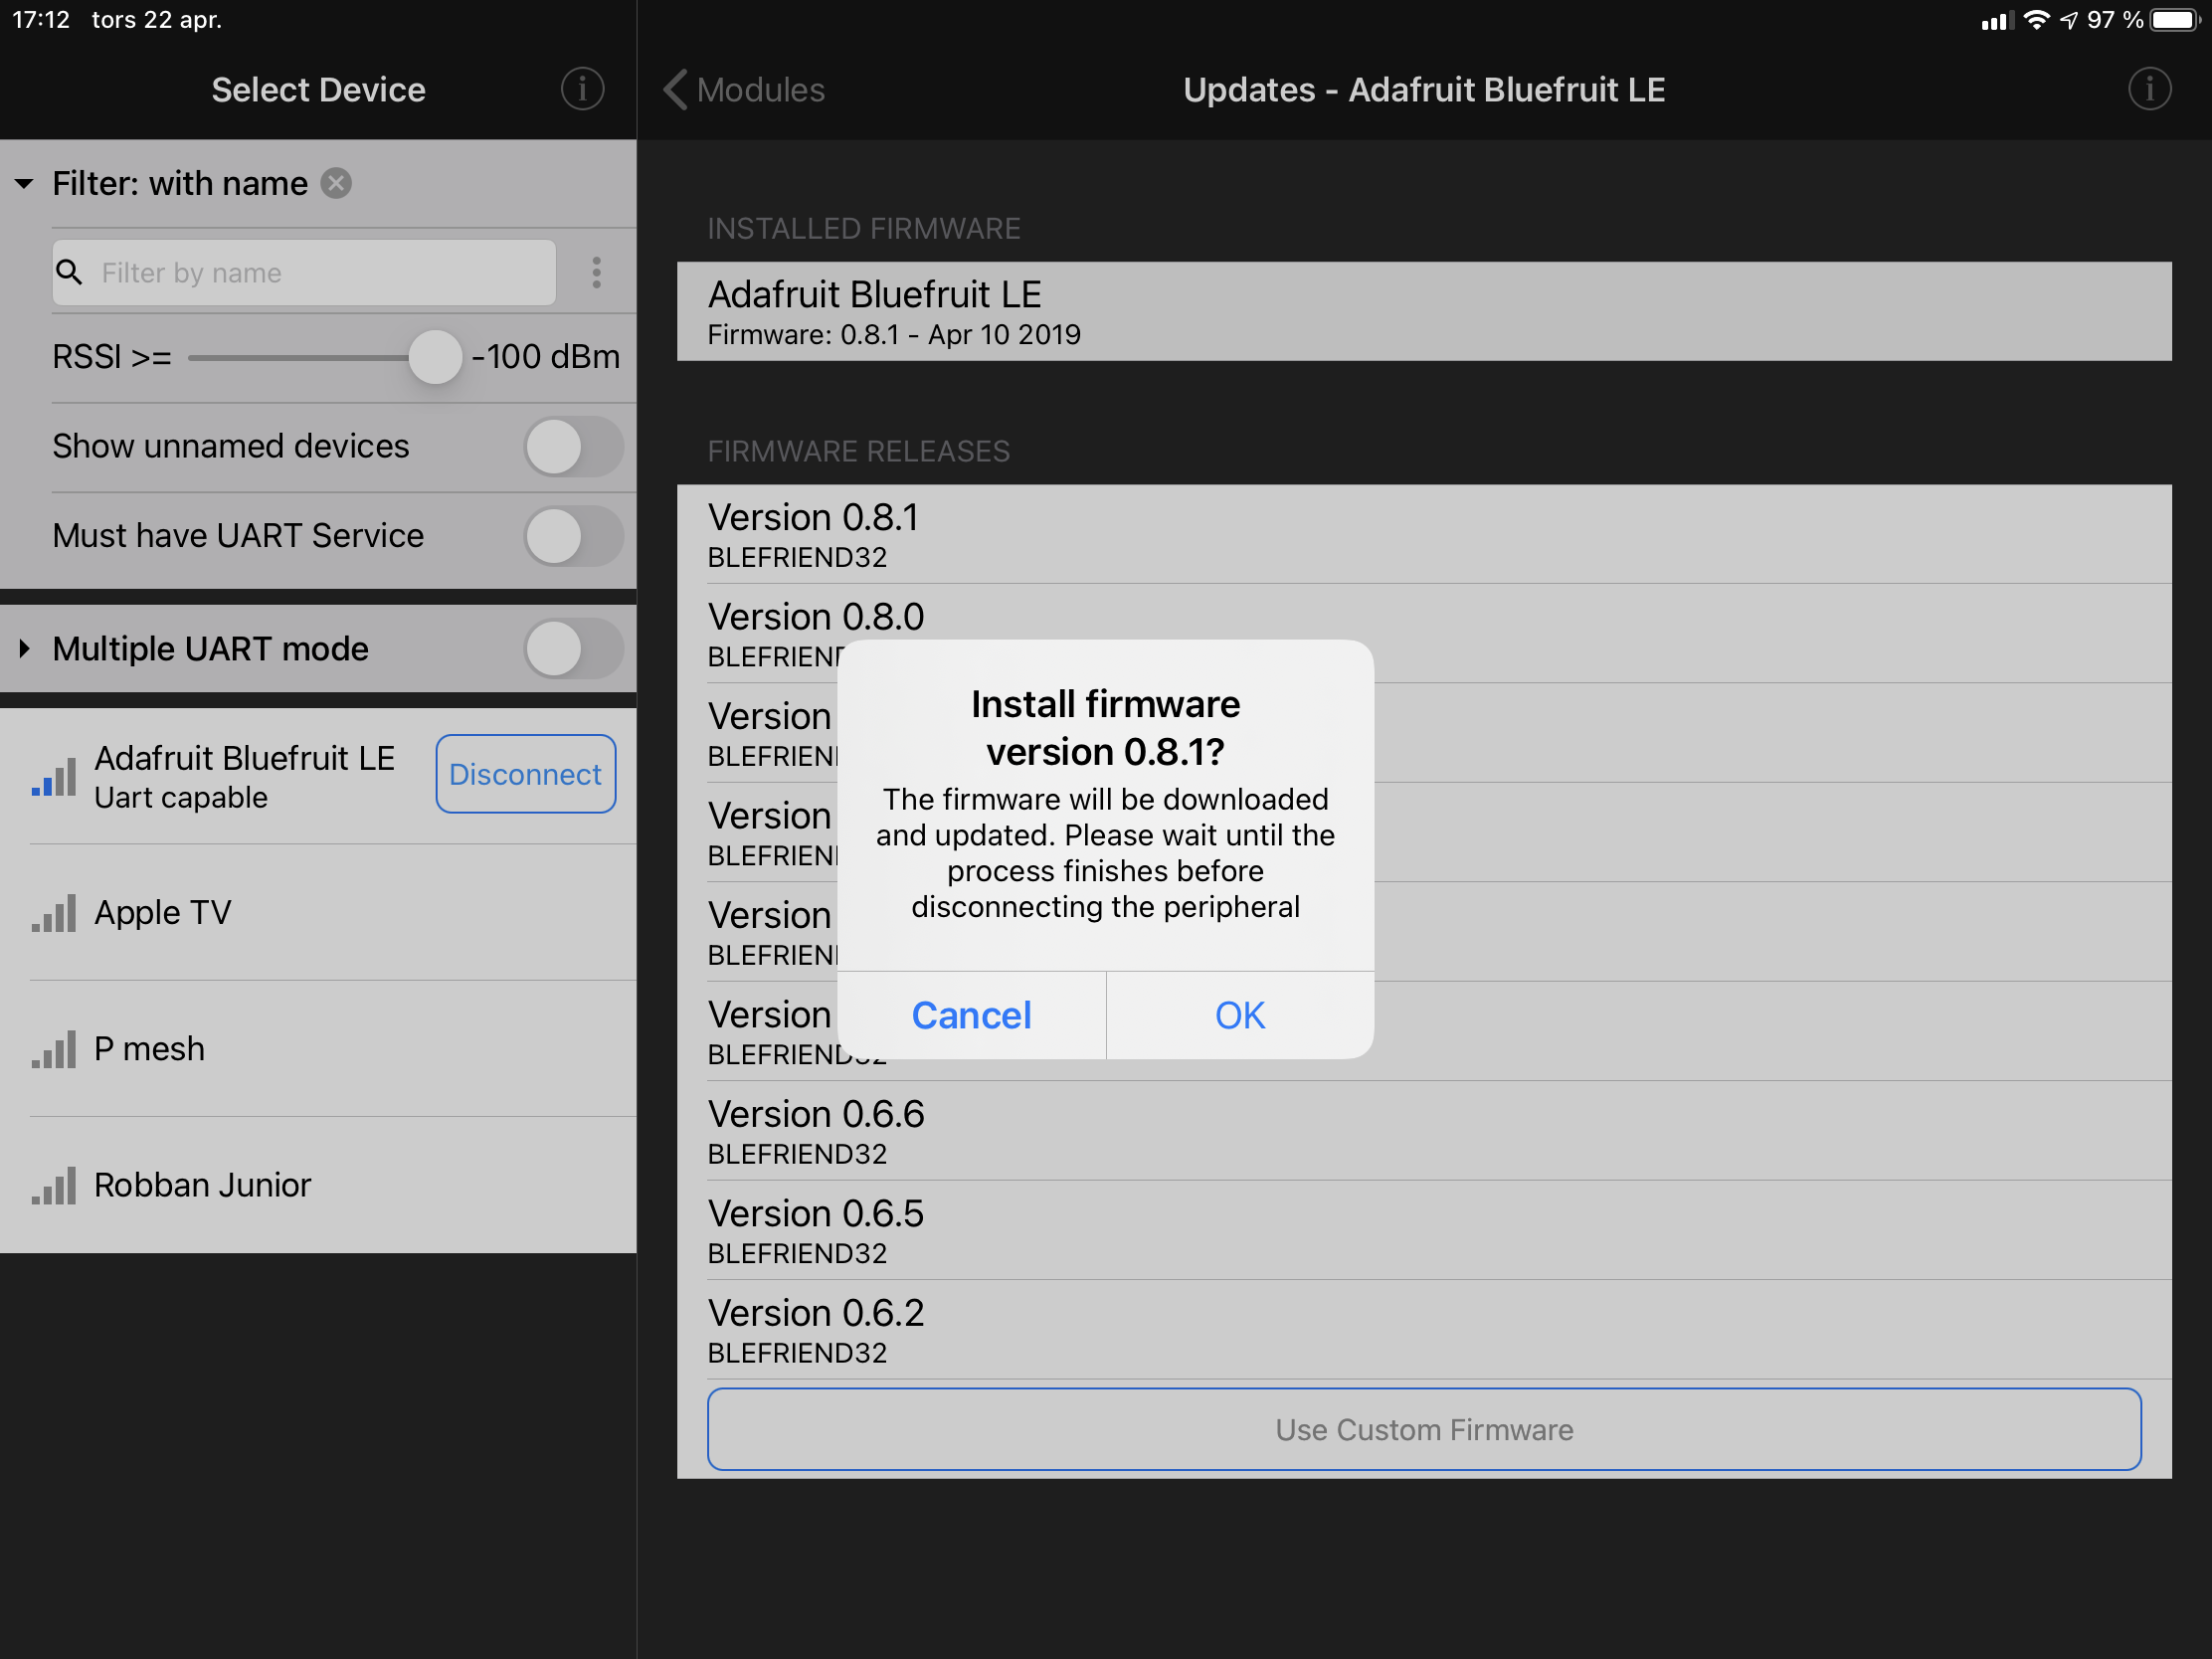
The easiest way to change firmware is actually via Bluetooth using the iPad app “Bluefruit Connect” which is available for free download. (The menu option is ” Updates ” at the bottom of the list of activities. At the time of writing, the latest firmware is 0.8.1.)
The next step was to change the speed setting in the module’s firmware. All settings are stored in non-volatile memory so you only need to do it once. In order for it to obey commands via the electrical serial port, the switch on the Bluetooth module must be switched to “CMD” mode.
I then connected my computer with a standard USB-to-RS-232 dongle plus the cable adapter described above.
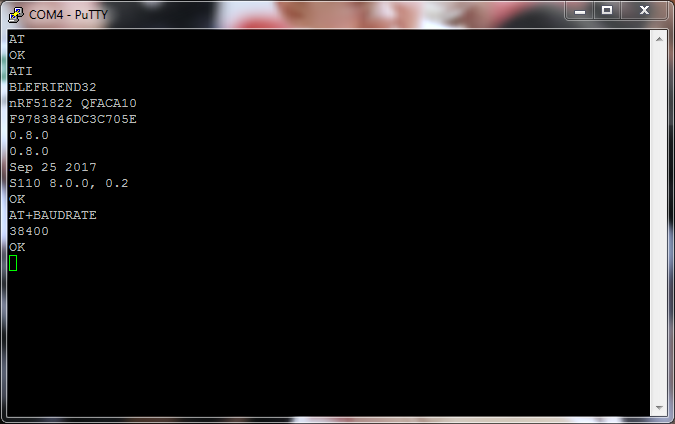
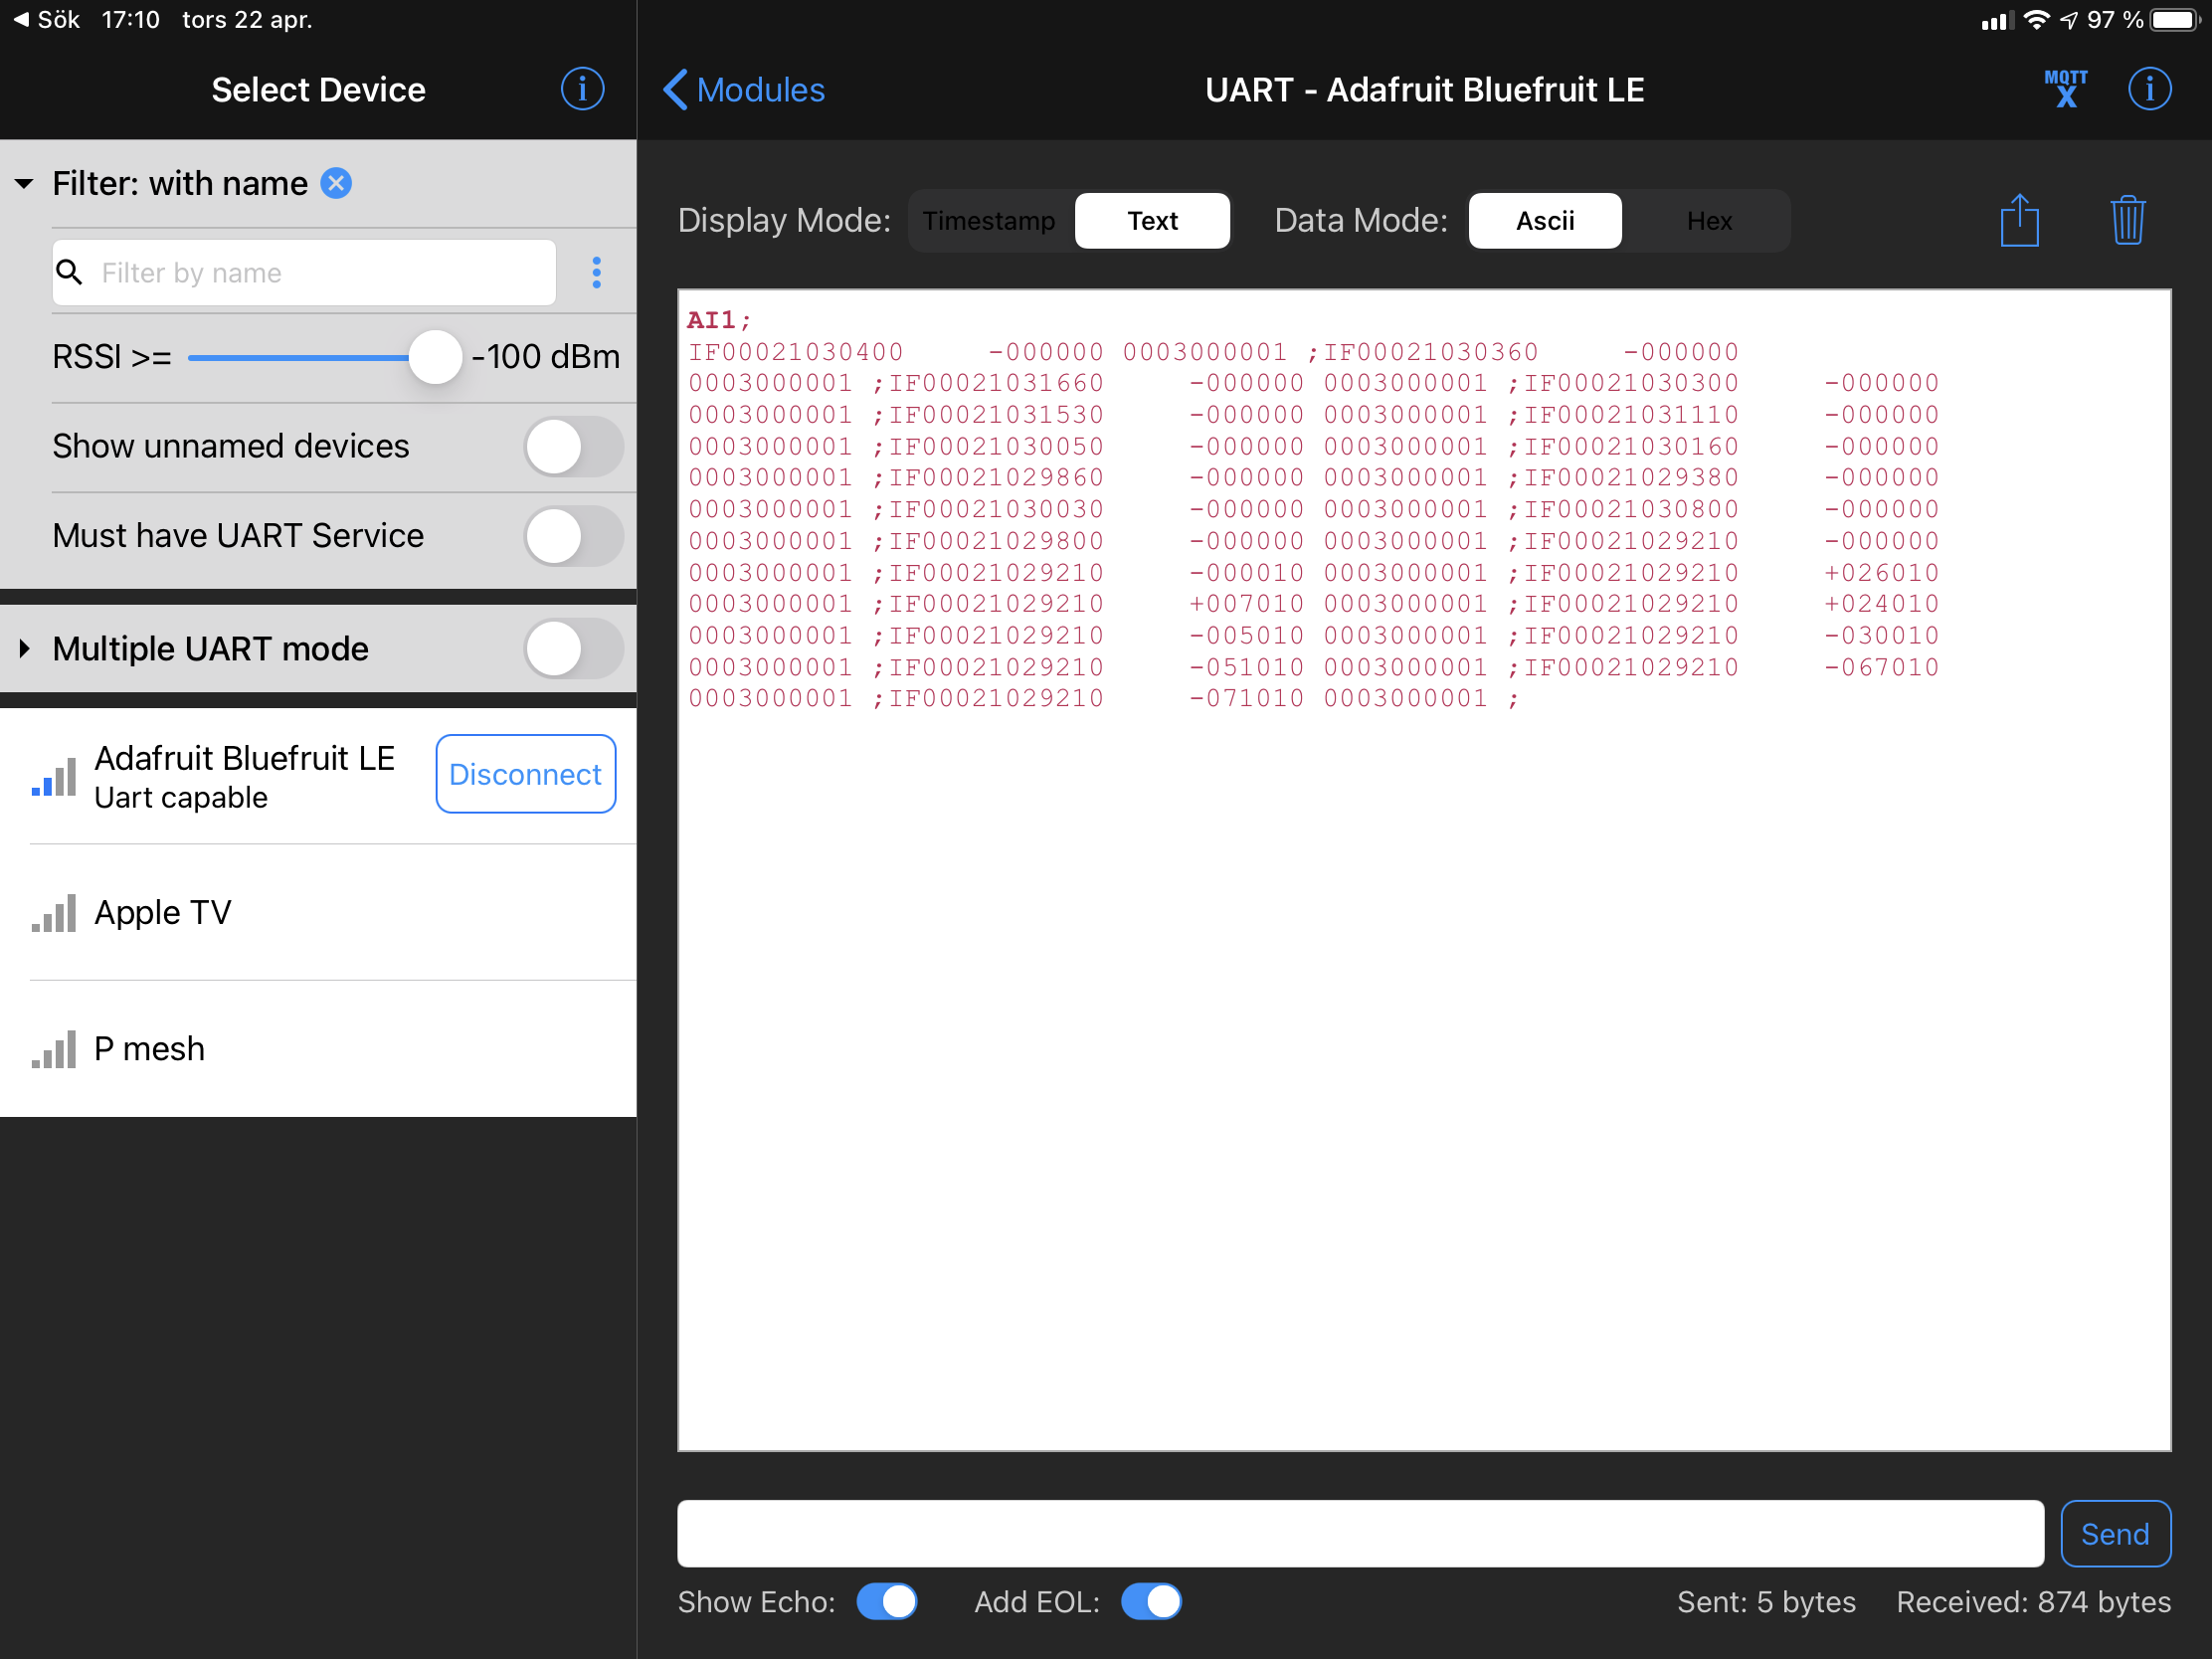
To send commands to the Bluetooth module, you need a terminal program. I used PuTTY which is easy to use and free. I started a terminal session in PuTTY on port COM4 (which was the port for my USB to RS-232 adapter) at a speed of 9600 bits/s. I started by typing the command “AT” to check that the module is responding. (You must end with ENTER and only use uppercase letters.) I then changed the speed of the module UART with the command string “AT+BAUDRATE=38400 “. After entering this command I restarted PuTTY at the new, higher rate. In this mode, I also connected the adapter via Bluetooth to RUMlog and was able to see the logger’s “requests” (frequency, mode, etc.) to the radio repeated continuously. When the speed was set, I then turned the switch back to “UART”, put the lid back on the box, and was done.