To avoid spreading off-frequency spots over the RBN, it is essential that a skimmer receiver is properly calibrated.
Even a small error of 0.1kHz may have an impact on propagation statistics and lead fellow hams to listen off frequency. Below are described four methods, one software-based and three hardware-based, of which two are quite straightforward and one somewhat more sophisticated.
For all three hardware-based methods it is important that your receiver has been switched on for at least 15 minutes before calibration, to make sure its temperature has completely stabilized. For best accuracy, it is also important to use the highest possible frequency, preferably the 6m band, when calibrating.
It is also important to know that CW Skimmer Server use point (“.”) as decimal separator in its configuration file (normally SkimSrv.ini, located in %appdata%\Afreet\Products\SkimSrv) regardless of your computer’s locale. Using comma (“,”) will not work.
Method #1: The “big data analytics” method
Since offline data from the RBN is available for download and there are a number of highly accurate skimmers (e.g. controlled by a GPS-controlled frequency normal), it is possible to calculate the relative frequency error of all active skimmers with very high accuracy using statistical methods.
If you don’t want to run your own software to do this, go here. Otherwise, continue reading.
The tool rbnskew does this. It can be built and run on any Linux machine, including Windows’ emulated Linux environment.
The tool is accompanied by three utility scripts, getrbndata for bulk download of RBN data, checkreferences to verify integrity of the chosen reference skimmers, and yesterday to download and run a complete analysis of yesterday’s RBN data.
If you want the yesterday script to run much faster and only check your own skimmer,
add -t NN2NN on the line starting with ./rbnskew in the script file, replacing NN2NN with your skimmer’s actual callsign.
The file reference contains a list of trusted skimmers and can be modified as required.
IMPORTANT: The number within parentheses is not the recommended calibration factor but an an adjustment factor. If the last line in yourSkimSrv.ini reads FreqCalibration=1.0 you can safely replace 1.0 with this new value. In all other cases you need to multiply the calculated correction factor with the current calibration factor to create the new FreqCalibration value.
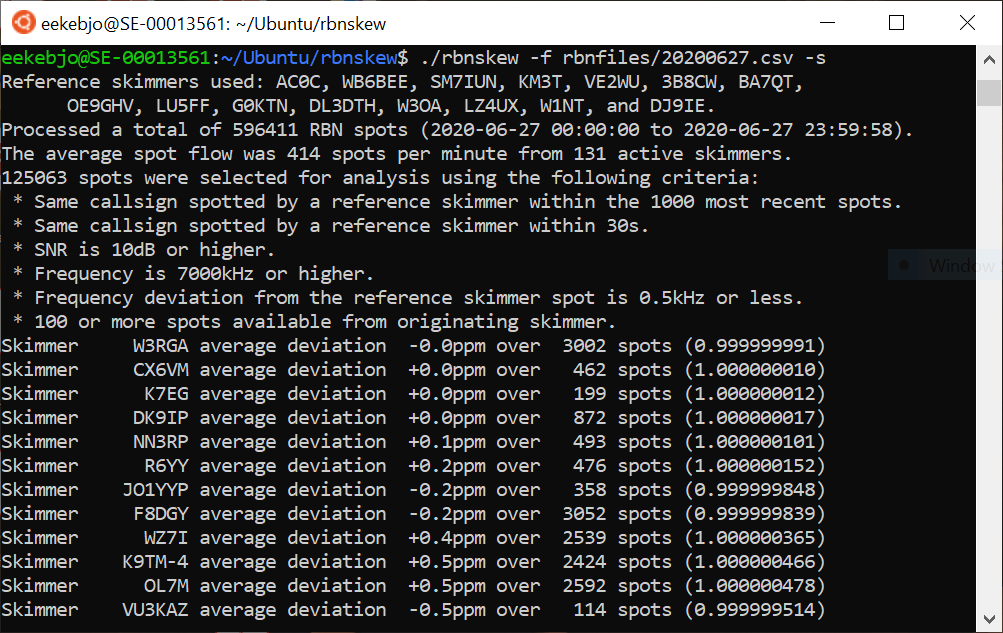
-s option.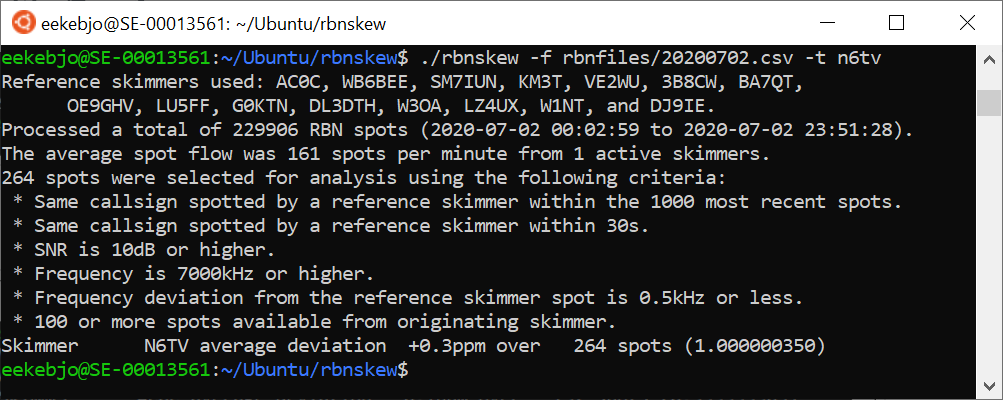
-t option. Executes faster. 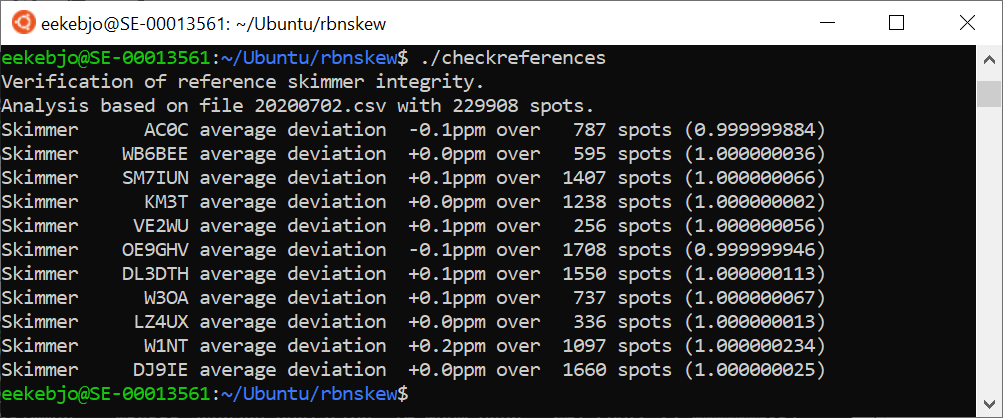
checkreferences.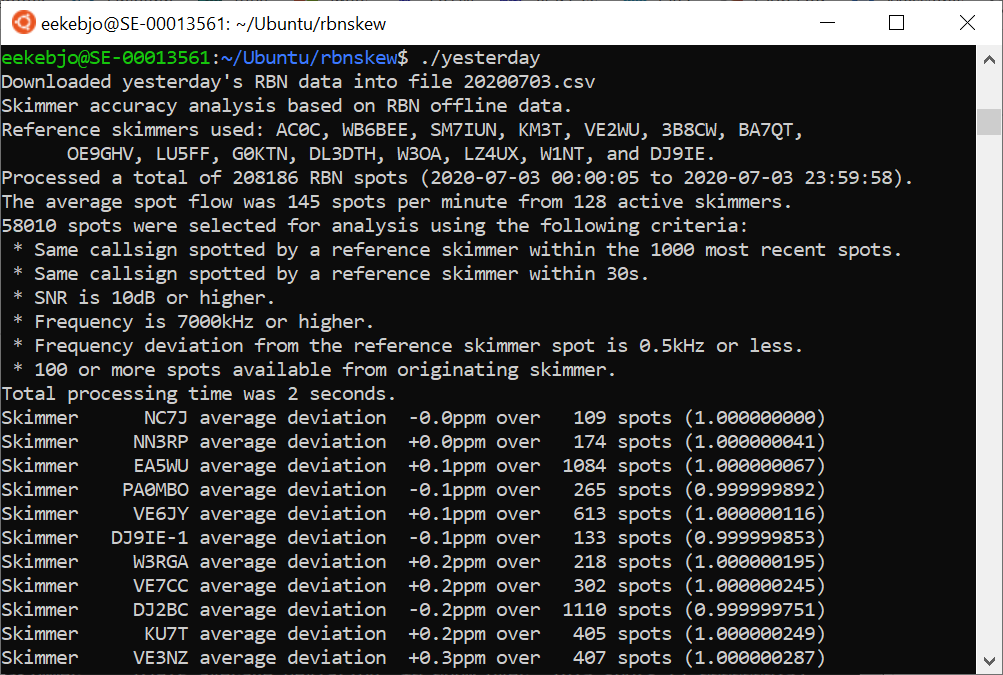
yesterday.The code including build instructions is available on GitHub for cloning or just download.
Method #2: The “good receiver” method
Using a receiver with high frequency accuracy, you can listen to the frequency where your skimmer reports a spot and determine the signal’s real frequency.
The formula for calculating the calibration factor used in CW Skimmer Server’s configuration file is:
Calibration factor = Reported frequency / Real frequency
For instance, if your skimmer reports a spot at 28023.2kHz and you determine it to actually be at 28023.0kHz, the calibration factor should be:
28023.2 / 28023.0 = 1.000007137
This means the frequency calibration line in SkimSrv.ini should be modified to read:
FreqCalibration=1.000007137
For accuracy reasons, the best band for calibration is obviously 6m.
Method #3: The “good transmitter” method
By transmitting a CW CQ on a known frequency, using a transmitter with high frequency accuracy, you can trigger your skimmer to report a spot that you can use to calibrate your receiver.
When doing this exercise, accuracy will suffer if the SDR overloads so you may have to introduce considerable attenuation in the antenna path. If the spot’s SNR report exceeds 40dB, reduce the signal even further. Also keep in mind that the skimmer typically does not report spots on multiple CQ on the same frequency, so if you want to repeat the test, change the frequency slightly.
Just as in the “good receiver” method above, the formula for calculating the calibration factor used in CW Skimmer Server’s configuration file is:
Calibration factor = Reported frequency / Real frequency
Since you are in complete control of the frequency used, it is recommended that you do this on the 6m band.
For instance, if your skimmer reports the spot at 50081.8kHz and your transmit frequency is actually 50082.0kHz, the calibration factor should be:
50081.8 / 50082 = 0.999996007
This means the frequency calibration line in SkimSrv.ini should be modified to read:
FreqCalibration=0.999996007
Method #4: The “SDR” method
All Hermes compatible skimmer receivers (such as the Red Pitaya board running Pavel Demin’s software) can not only connect to CW Skimmer Server but also to a traditional SDR client. This can be used for a much more accurate frequency calibration than the two previously described methods.
One of the more popular Hermes-compatible clients for Windows is PowerSDR. A Windows executable for Red Pitaya’s fork can be downloaded here.
Before starting you should make sure you have access to a highly accurate signal source. This could be a well calibrated radio transceiver or a signal generator. Today there are for instance GPS disciplined oscillators offering extremely high accuracy at very reasonable cost. Examples of such can be found at e.g. Leo Bodnar or SDR Kits. There are also lots of them on eBay.
Also make sure your receiver is connected to the same LAN as your computer and that you know the IP address of your Hermes-compatible receiver.
For accuracy reasons, the best frequency to use is in the 6m band. Because of this method’s inherent accuracy, it is however possible to use reference signals at lower frequency with good results, such as the standard frequency and time station RWM on 4996, 9996, or 14996kHz.
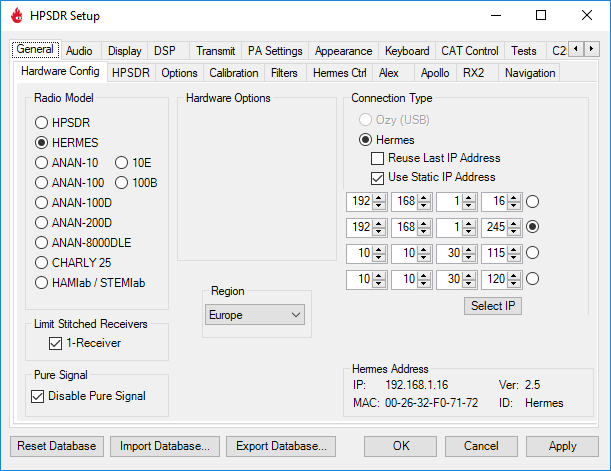
Install PowerSDR (which does take some time). Do not click on Power yet. Instead open up the setup panel by clicking the word Setup in the upper left corner.
Select the Hardware Config tab and chose HERMES in the Radio Model panel Also make sure the receiver’s IP address is correctly entered and activated in the Connection Type panel.
Click Apply and OK.
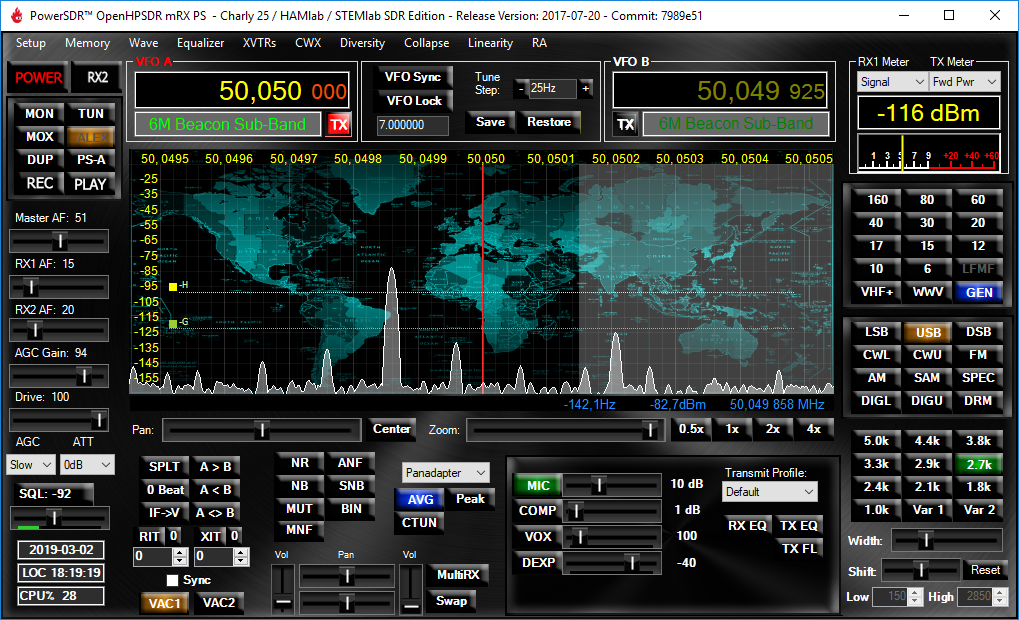
Now click on the “Power” button in the upper left hand corner of the main window. The receiver should start and if the audio channels are correctly configured you should hear noise in the loudspeaker and also see noise at the bottom of the spectrum display.
Move the Zoom slider, just below the spectrum graph, all the way to the right for maximum accuracy.
Tune PowerSDR to the frequency used for the test.
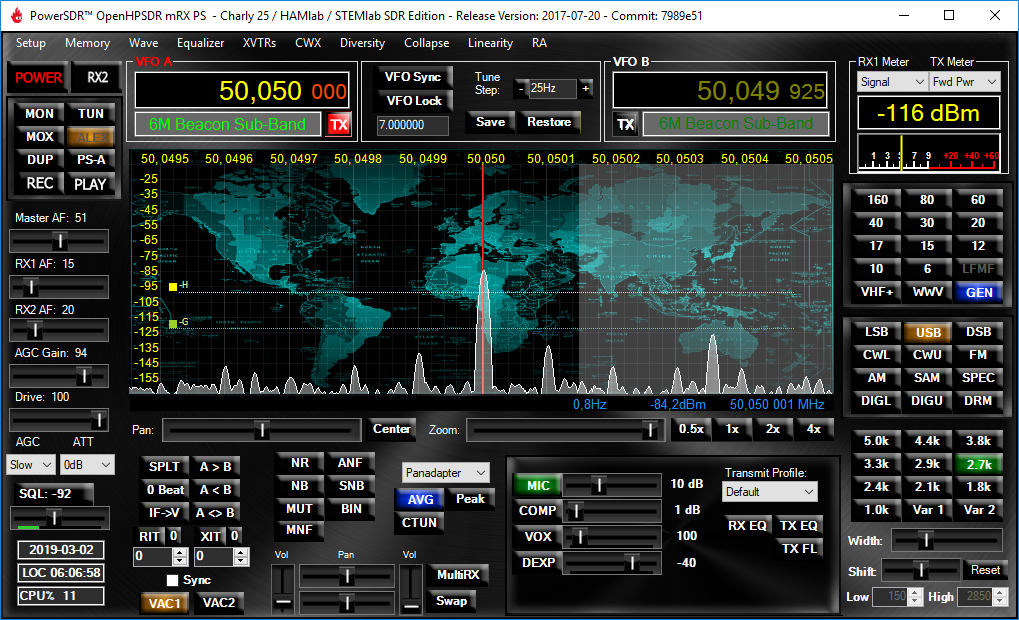
Apply the test signal and observe receiver’s opinion about the frequency received in the blue text in the lower right hand corner of the spectrum scope.
Unless you are extremely lucky, you will find the frequency to be somewhat off. The picture below displays a frequency error of -2.9ppm.
Keep in mind that an SDR easily overloads so you may have to introduce attenuation depending on your signal source.
Re-open the setup panel and chose the Calibration tab. Adjust the Correction Factor in the HPSDR Freq Cal Diagnostic panel while watching the frequency readout as well as the peak in the main window’s spectrum scope. (The Correction Factor text box will respond to your scroll wheel.)
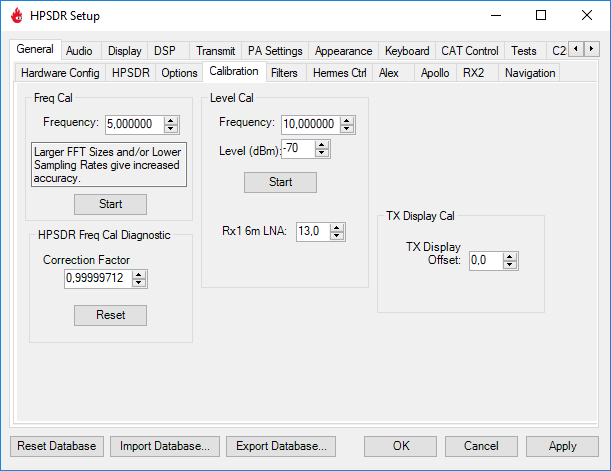
When you have reached satisfactory agreement between the actual frequency and the frequency displayed in PowerSDR, write down the correction factor.
This is the number you should enter into SkimSrv.ini in the line starting with FreqCalibration. E.g.
FreqCalibration=0.99999712
For a receiver expecting a correction value in ppm (such as Pavel Demin’s FT8 receivers for the Red Pitaya) the formula is
CorrectionInPPM = 1,000,000 * (FreqCalibration – 1.0)
Which in this particular case yields -2.88ppm.
In summary:
- If the receiver underestimates the received frequency, the calibration factor for CW Skimmer is less than one and the ppm correction value is negative.
- If the receiver overestimates the received frequency, the calibration factor for CW Skimmer is greater than one and the ppm correction value is positive.
Since PowerSDR displays the received frequency with a resolution of 1Hz, this method is close to 100 times more accurate than the two previous methods based on spot reporting.
It should be noted that PowerSDR also offers the ability to do the frequency calibration automatically but I have found the manual method both more accurate and more robust.
